
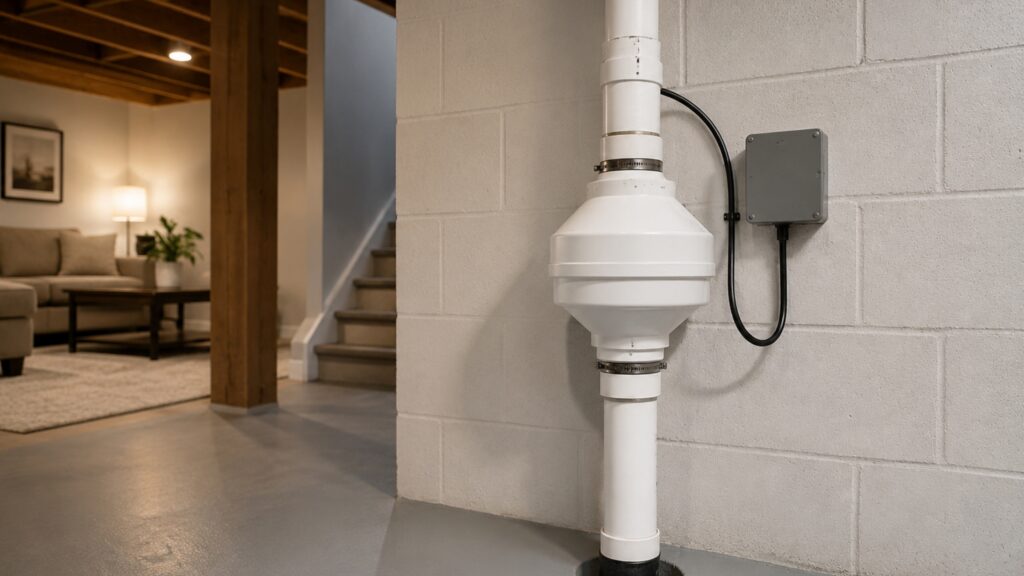
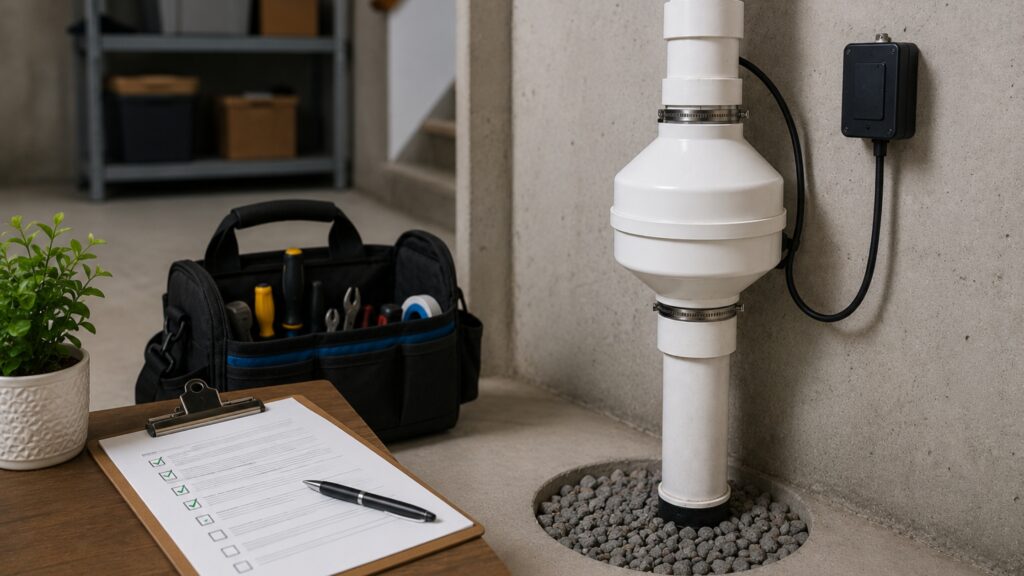
A radon mitigation system inspection is a structured evaluation of every component in your installed radon reduction system — not a radon test and not a new installation assessment. A certified inspector verifies that your system is actively depressurizing the sub-slab air, moving it safely out of the home, and keeping indoor radon levels below the EPA action level of 4 pCi/L.
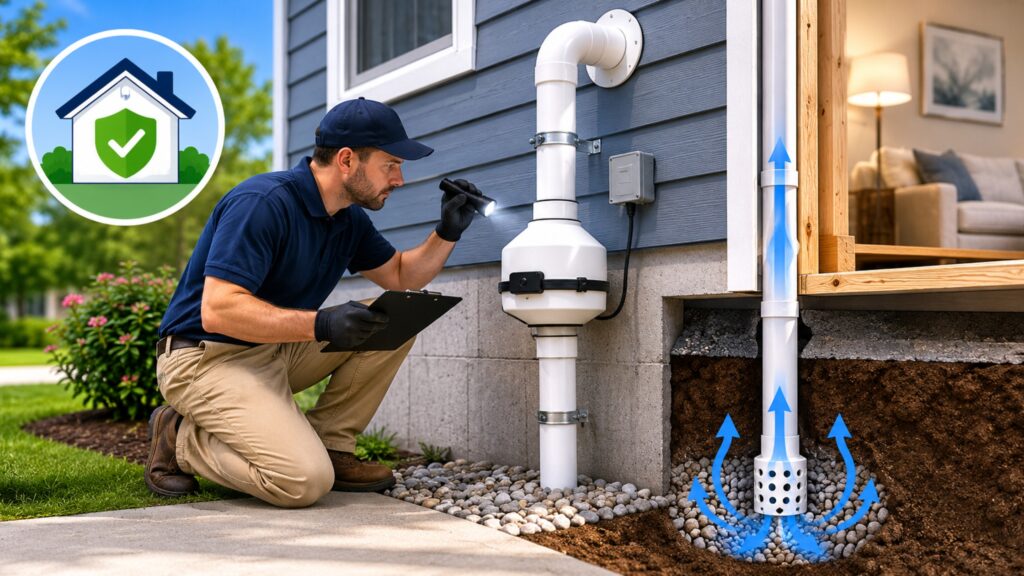
Table of Contents
- What Is a Radon Mitigation System Inspection?
- How Often Should a Radon Mitigation System Be Inspected?
- The 8-Point Inspection Checklist: What Professionals Examine
- Red Flags: Signs Your Radon System Is Failing or Underperforming
- DIY Homeowner Checks vs. Professional Radon System Inspection
- How to Hire a Qualified Radon Mitigation Inspector
- Post-Inspection: What to Do If Your System Fails Inspection
- Frequently Asked Questions About Radon System Inspections
What Is a Radon Mitigation System Inspection?
A radon mitigation system inspection is a hands-on, component-by-component evaluation of an already-installed radon reduction system. Its purpose is to confirm that the system is operating correctly — not to measure radon levels in the air and not to design or install new equipment. Many homeowners conflate three separate services: radon testing, system installation, and system inspection. Understanding the difference protects your health and your budget.
Radon testing measures the concentration of radon gas in your home’s air, typically using a short-term or long-term radon test kit placed in the lowest livable area. System installation is the physical process of drilling a suction pit into the sub-slab aggregate layer, running a PVC exhaust pipe through the structure, and connecting a radon mitigation fan to create negative pressure beneath the slab — a method known as sub-slab depressurization (SSD). System inspection comes after installation and confirms that all those components continue to work as designed.
The most common residential radon mitigation approach is an active sub-slab depressurization system. “Active” means a powered radon fan draws soil gas from beneath the slab and exhausts it outside. Homes built with radon-resistant new construction (RRNC) features may start with a passive system — no fan, just a pipe — but passive systems often require fan activation to achieve acceptable radon levels. An inspection evaluates both active and passive configurations against the technical standards outlined in the EPA’s Consumer’s Guide to Radon Reduction and the EPA Radon Mitigation Standards.
Learn more: how sub-slab depressurization systems work
How Often Should a Radon Mitigation System Be Inspected?
The EPA and AARST-NRPP (American Association of Radon Scientists and Technologists – National Radon Proficiency Program) recommend a two-tier inspection schedule: a professional inspection every 2 years at minimum, combined with a homeowner visual check every 6 months. Many radon professionals and state radon programs recommend annual professional inspections, particularly in high-risk geographic areas. Check radon risk levels in your state to understand whether your region warrants more frequent attention.
Radon fans have a typical service life of 5 to 10 years. Without regular inspection, a fan can degrade gradually — reducing suction pressure without triggering any obvious alarm. The American Cancer Society identifies radon as the second leading cause of lung cancer in the United States, responsible for approximately 21,000 deaths per year. That risk context makes routine inspection a non-negotiable maintenance step, not an optional upgrade.
Why Annual Inspections Matter More Than You Think
Radon systems don’t fail dramatically. A fan bearing wears down slowly. A PVC joint develops a hairline crack over a winter freeze-thaw cycle. Sealant around a sub-slab penetration shrinks and separates over years. None of these failures trigger a visible alarm — but each one reduces the system’s ability to maintain negative pressure beneath your slab. Annual professional inspections catch these gradual failures before indoor radon climbs back above 4 pCi/L.
After any major renovation, foundation repair, or significant weather event, schedule an unplanned inspection. Structural work can disturb pipe runs, crack sealant, or alter the sub-slab pressure field. A CO₂ tracer gas diagnostic test — in which a technician introduces carbon dioxide near potential entry points and tracks whether the system captures it — can confirm that the suction field still extends across the full sub-slab area after disruption.
Learn more: how radon testing works
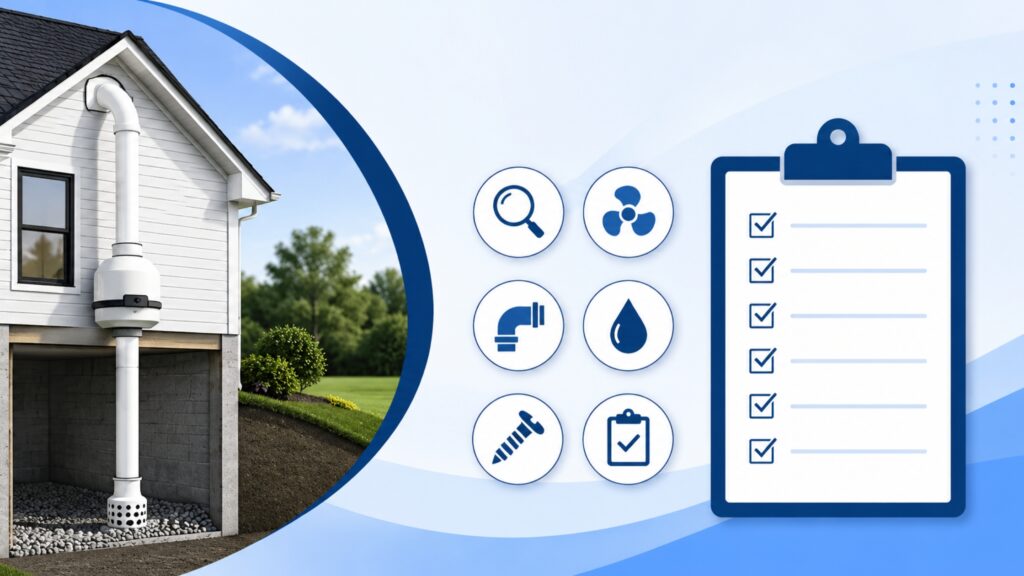
The 8-Point Inspection Checklist: What Professionals Examine
A radon mitigation system inspection includes verifying fan operation and airflow, checking the manometer for proper negative pressure, inspecting PVC pipe joints and seals for cracks or gaps, confirming the exhaust terminates at code-required height, reviewing recent radon test results, and assessing the electrical connections to the radon fan.
That summary covers the core scope, but a thorough professional inspection goes deeper. Below are the primary checkpoints, organized by component.
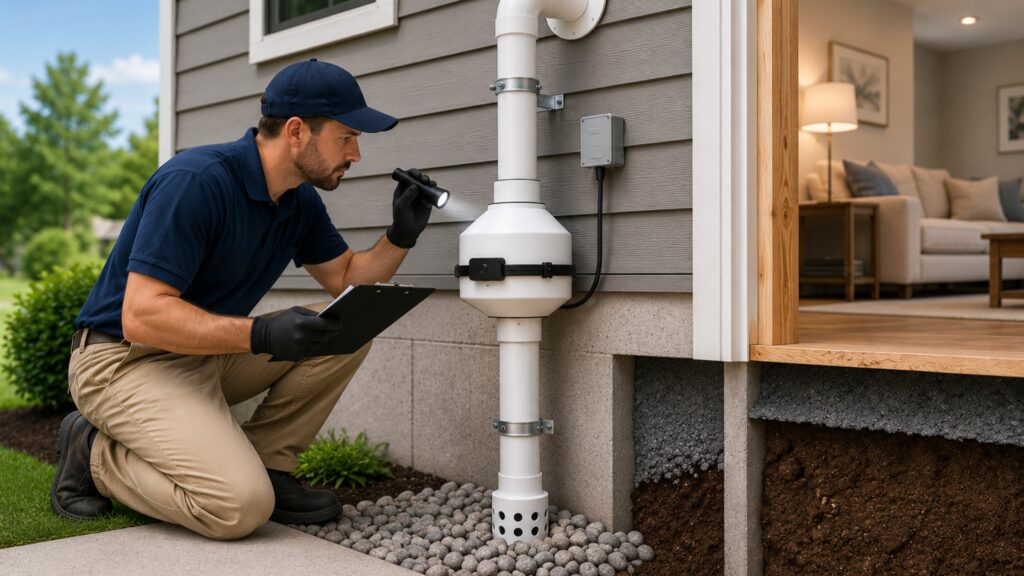
1. Fan Performance and Airflow Verification
The radon fan is the heart of an active SSD system. Inspectors begin by confirming the fan is running — a check that sounds obvious but catches a surprising number of failures, since a tripped breaker or failed capacitor can shut a fan down silently. Beyond confirming operation, inspectors assess fan performance quantitatively.
A qualified technician measures static pressure at the fan inlet using a manometer or magnehelic gauge. They listen for unusual sounds: grinding or rattling indicates worn bearings; a high-pitched whine can signal the fan is working against excessive resistance. Some inspectors use a tachometer to verify fan RPM is within the manufacturer’s specified range. Fan performance data should be compared against the original installation documentation and the manufacturer’s specification sheet — which is why retaining your radon system warranty and manufacturer documentation matters from day one.
If the fan shows reduced airflow, the inspector evaluates whether the issue is the fan itself or a blockage or leak elsewhere in the pipe system. A carbon dioxide (CO₂) tracer gas diagnostic test may be used to verify that the soil gas pressure field extension — the area of sub-slab soil under negative pressure — still reaches all intended zones beneath the foundation.
2. Manometer Reading: Understanding Normal vs. Abnormal Pressure
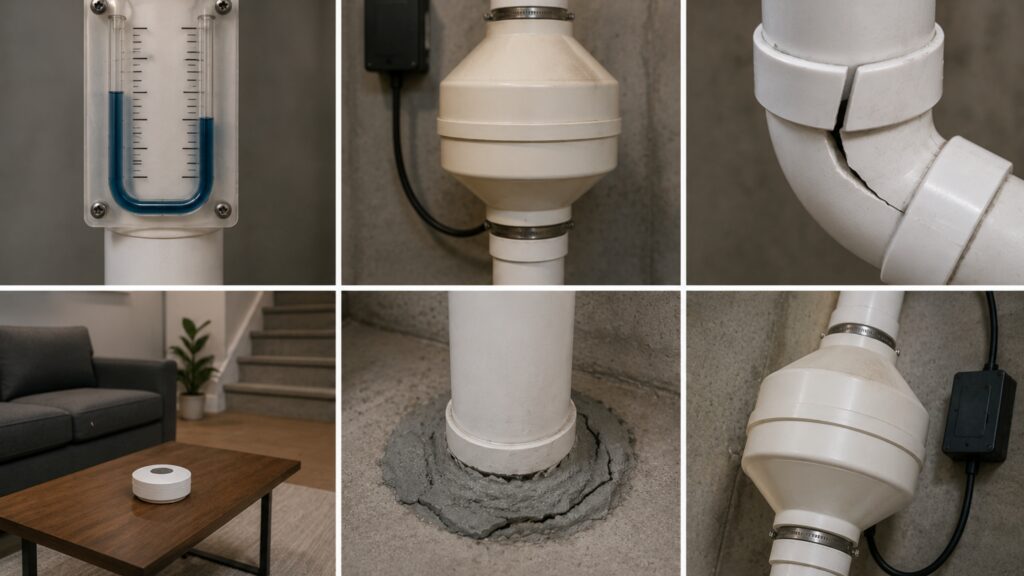
Every properly installed active SSD system includes a visual pressure indicator, most commonly a U-tube manometer mounted on the pipe in an accessible location. Some newer systems use a digital manometer. Both devices show whether the system is maintaining negative pressure in the sub-slab zone relative to the indoor air above the slab.
On a U-tube manometer, the fluid column in the pipe-side arm should sit lower than the indoor-air side, indicating suction. A typical properly functioning system shows a pressure differential of 0.02 to 0.05 inches of water column (WC), though acceptable ranges vary by system design and soil type. A reading of zero means the system has lost suction — a clear failure signal. A reversed reading, where the pipe side is higher, indicates positive pressure pushing soil gas into the home rather than drawing it out.
Inspectors document the manometer reading and compare it to the baseline recorded at installation. A reading that has dropped significantly since installation — even if still technically in the positive range — warrants further investigation. Homeowners should photograph their manometer monthly as part of routine self-monitoring.
3. Pipe Integrity, Sealing, and Exhaust Termination Points
The PVC exhaust pipe carries radon-laden soil gas from beneath your slab to the exterior. Any crack, loose joint, or failed sealant along that route allows radon to escape into living spaces rather than exit the building. Inspectors visually trace the entire pipe run, checking every joint for separation, discoloration, or visible gaps. They pay particular attention to penetrations through floors, walls, and the building envelope, where sealant is most vulnerable to movement and temperature cycling.
The exhaust termination point — where the pipe exits the building — must meet EPA guidelines and local building codes. The EPA Radon Mitigation Standards require the exhaust to terminate at least 10 feet above grade or 2 feet above any opening into the building (windows, doors, vents) within 10 horizontal feet, whichever is higher. An improperly positioned termination can allow exhausted radon to re-enter the home through windows or HVAC intakes. Inspectors also confirm that the termination has a proper rain cap and is free of obstructions such as bird nests or debris.
Learn more: how sub-slab depressurization systems work
Red Flags: Signs Your Radon System Is Failing or Underperforming
Certain observable signs indicate your radon system needs immediate professional attention. Recognizing these red flags early can prevent radon levels from rising back to dangerous concentrations.
Manometer fluid at equal levels or reversed. This is the single most visible failure indicator. If the U-tube fluid is level or the pipe-side column is higher than the room-air side, your fan has lost suction or failed entirely.
Audible changes in fan noise. A grinding, rattling, or intermittent humming sound from the radon fan signals bearing wear or motor degradation. A fan running louder than usual may also indicate a blockage in the pipe.
Visible cracks or separation in PVC pipe joints. Any gap in the pipe run, especially near floor penetrations or in unconditioned spaces like crawlspaces, is a direct pathway for radon to escape into the home.
A recent radon test result at or above 4 pCi/L. The EPA action level is 4 pCi/L. If a short-term or long-term radon test kit placed in the lowest livable area of your home returns a result at or above this threshold, your system is not performing adequately — even if it appears to be running.
Sealant shrinkage or cracking around sub-slab penetrations. The sealant applied around the suction pit entry point and any floor penetrations degrades over time. Visible cracking or separation is a maintenance item that directly affects system performance.
Fan has not been inspected or replaced in more than 10 years. Radon fans have a finite service life. A fan approaching or past the 10-year mark should be evaluated for proactive replacement even if it appears functional.
Learn more: how radon testing works
DIY Homeowner Checks vs. Professional Radon System Inspection
Homeowners can and should perform basic visual checks every 6 months. These checks are not a substitute for professional inspection, but they can catch obvious failures between scheduled service visits.
What homeowners can safely check:
- Manometer reading. Look at the U-tube or digital manometer. The pipe-side fluid should be lower than the room-air side. Photograph the reading and compare it to previous months.
- Fan operation. Place your hand near the fan housing (not the electrical connections) to feel for vibration confirming the unit is running. Listen for unusual noises.
- Visual pipe inspection. Walk the visible pipe run and look for cracks, separation at joints, or discoloration that might indicate moisture intrusion or heat damage.
- Exhaust termination. Check that the exterior pipe termination is unobstructed and the rain cap is intact.
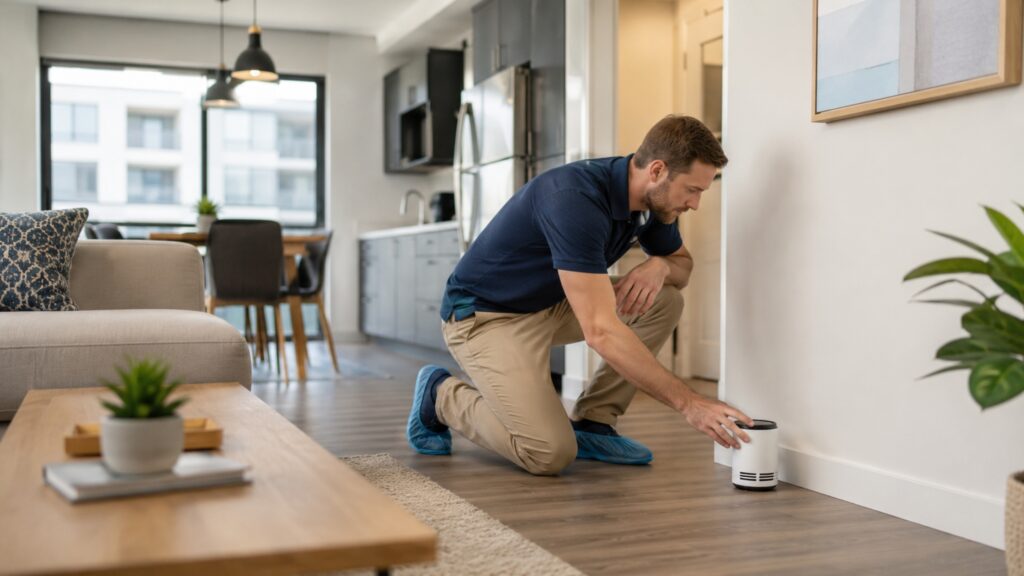
- Radon test. Place a short-term radon test kit in the lowest livable area. This is the most direct performance check available to a homeowner.
What requires a certified professional:
- Static pressure measurement and fan performance quantification
- CO₂ tracer gas diagnostic testing to verify soil gas pressure field extension
- Electrical connection inspection and load testing
- Sealant integrity assessment at sub-slab penetrations
- Code compliance verification of exhaust termination height and placement
- Interpretation of test data against installation baseline documentation
Attempting electrical inspection or pressure diagnostics without proper equipment and training risks both personal injury and inaccurate conclusions. The distinction matters: a homeowner who sees a normal-looking manometer and hears a running fan may have a system that passes the visual check but fails on pressure diagnostics — a gap only a professional can close.
Learn more: find a certified radon mitigation contractor
How to Hire a Qualified Radon Mitigation Inspector
Not every contractor who installs radon systems is qualified to inspect them, and not every home inspector carries radon-specific credentials. Two organizations certify radon mitigation professionals in the United States: AARST-NRPP (American Association of Radon Scientists and Technologists – National Radon Proficiency Program) and NEHA-NRPP (National Environmental Health Association – National Radon Proficiency Program). Both programs require candidates to complete approved training, pass a proctored examination, and maintain continuing education credits to keep their certification active.
When hiring an inspector, request the following before signing a contract:
- Certification number and expiration date from AARST-NRPP or NEHA-NRPP. Verify the credential directly on the certifying body’s website.
- Proof of state licensure if your state requires it. Approximately 15 states have mandatory radon contractor licensing programs.
- Errors and omissions (E&O) insurance and general liability coverage.
- A written inspection scope of work that specifies every component to be evaluated and the format of the inspection report.
- References from previous radon-specific inspection work — not just installation or general home inspection projects.
Ask the inspector directly: Do you use a written checklist? Will you provide a written report with pass/fail findings for each component? Do you carry equipment to measure static pressure and airflow, not just visual inspection? A qualified professional will answer yes to all three.
The EPA’s Consumer’s Guide to Radon Reduction recommends using state-certified contractors and verifying credentials through the state radon office or a national certification program. Many state radon programs maintain searchable contractor databases at no cost to homeowners.
Learn more: find a certified radon mitigation contractor
Post-Inspection: What to Do If Your System Fails Inspection
A failed inspection is not a crisis — it is the system working as intended by flagging a problem before it becomes a health risk. The inspector’s written report should categorize each finding as a deficiency requiring immediate repair, a maintenance item to address within 30 to 90 days, or an advisory note for future monitoring.
Repair vs. Replacement Decisions
- Fan replacement is the most common repair following inspection. A new radon fan typically costs $150 to $350 for the unit, with labor adding $100 to $250 depending on accessibility. If the fan is within its warranty period, check your radon system warranty and manufacturer documentation — many manufacturers offer 5-year warranties, and some extend to 10 years for registered units.
- Pipe repairs and re-sealing are generally low-cost fixes. PVC joint repairs and sealant replacement at sub-slab penetrations typically run $75 to $200 per location. If multiple joints have failed, a contractor may recommend replacing a full pipe section.
- Full system replacement becomes the right call when the fan is beyond its service life, the pipe routing was never code-compliant, or diagnostic testing reveals that the original suction pit did not achieve adequate soil gas pressure field extension across the foundation. Full replacement costs typically range from $800 to $2,500 depending on system complexity. Review radon mitigation system installation costs for a detailed cost breakdown.
Re-Testing After Repairs
After any repair or component replacement, the EPA recommends waiting 24 hours before placing a short-term radon test kit, then running the test for the full manufacturer-specified period (typically 48 to 96 hours for short-term kits). For definitive confirmation, follow up with a long-term test kit (90 days or more) to capture seasonal variation. A result below 2 pCi/L is the target many radon professionals recommend as a practical performance benchmark, well below the EPA action level of 4 pCi/L.
Document the repair, the post-repair test result, and any updated manufacturer documentation in a home maintenance file. This record supports future inspections, satisfies disclosure requirements in real estate transactions, and provides evidence of system performance for insurance purposes.
Learn more: how radon testing works
FAQs
1. How often should a radon mitigation system be inspected?
The EPA and AARST-NRPP recommend a professional inspection at least every 2 years, with many radon professionals advising annual inspections. Homeowners should perform a basic visual check — manometer reading, fan noise, visible pipe condition — every 6 months. Schedule an unplanned inspection after any major renovation, foundation work, or significant weather event.
2. What does a radon mitigation system inspection include?
A professional radon mitigation system inspection includes verifying fan operation and measuring airflow and static pressure, checking the manometer for correct negative pressure, inspecting all PVC pipe joints and sealant for cracks or gaps, confirming exhaust termination height meets EPA and local code requirements, reviewing recent radon test results, and assessing electrical connections to the radon fan. Some inspectors also perform a CO₂ tracer gas diagnostic test to verify sub-slab pressure field coverage.
3. How do I know if my radon mitigation system is working properly?
The most reliable indicator is a current radon test result below 4 pCi/L — the EPA action level. Between tests, check your manometer monthly: the pipe-side fluid column should sit lower than the room-air side, indicating active suction. A level or reversed reading means the system has lost pressure. Also confirm the fan is running and free of unusual noise.
4. What should a manometer reading be on a radon system?
A properly functioning active sub-slab depressurization system typically shows a pressure differential of 0.02 to 0.05 inches of water column (WC) on the manometer, with the pipe-side column lower than the indoor-air side. Acceptable ranges vary by system design and soil conditions. A reading of zero or a reversed reading (pipe side higher) is a failure indicator requiring immediate professional evaluation.
5. Can I inspect my radon mitigation system myself?
Homeowners can perform basic visual checks: reading the manometer, listening for fan noise, walking the visible pipe run for cracks, and placing a radon test kit. These checks are valuable between professional visits. However, static pressure measurement, electrical inspection, CO₂ tracer gas testing, and code compliance verification require a certified radon professional with proper equipment.
6. How much does a radon mitigation system inspection cost?
A professional radon mitigation system inspection typically costs $100 to $300, depending on your region, system complexity, and whether a radon test is included. Some contractors bundle an inspection with a short-term radon test kit at a combined rate. Inspections that include CO₂ tracer gas diagnostic testing or detailed pressure mapping may cost more. Review radon mitigation system installation costs for context on related service pricing.
7. What certifications should a radon inspector have?
Look for certification from AARST-NRPP (American Association of Radon Scientists and Technologists – National Radon Proficiency Program) or NEHA-NRPP (National Environmental Health Association – National Radon Proficiency Program). Both are nationally recognized programs that require examination, training, and continuing education. Verify the certification number directly on the certifying body’s website before hiring. Check whether your state also requires a separate radon contractor license.
8. What happens if my radon system fails inspection?
The inspector’s written report will categorize each finding by urgency. Common repairs include fan replacement ($150–$350 for the unit plus labor), pipe joint re-sealing ($75–$200 per location), or, in more serious cases, full system replacement ($800–$2,500). After repairs, run a short-term radon test kit to confirm performance, followed by a long-term test for seasonal verification. A result below 2 pCi/L is a practical performance target well below the EPA’s 4 pCi/L action level.
Glossary
Active sub-slab depressurization (SSD) system: A radon mitigation method that uses a powered fan to draw soil gas from beneath a concrete slab and exhaust it outside the building. The most common and effective radon mitigation approach for slab-on-grade and basement foundations.
EPA action level (4 pCi/L): The radon concentration threshold — 4 picocuries per liter of air — at which the U.S. Environmental Protection Agency recommends taking action to reduce indoor radon levels. The EPA also recommends considering mitigation at levels between 2 and 4 pCi/L.
Manometer: A pressure measurement device used to verify that a radon mitigation system is maintaining negative pressure beneath the slab. U-tube manometers use a visible fluid column; digital manometers provide a numeric readout. Both are installed on the radon pipe as a continuous visual indicator.
Radon mitigation fan: The powered component of an active SSD system that creates suction beneath the slab and moves soil gas through the PVC exhaust pipe to the exterior. Fans have a typical service life of 5 to 10 years and must be matched to the system’s pressure and flow requirements.
Soil gas pressure field extension: The area of sub-slab soil that a radon system places under negative pressure. Adequate extension across the full foundation footprint is essential for effective radon reduction. Verified using a CO₂ tracer gas diagnostic test or pressure field diagnostic during installation and inspection.
Suction pit: A void or aggregate layer beneath the slab where the radon system’s suction pipe terminates. The suction pit allows soil gas to be drawn from a broad area rather than a single point. Its size and the permeability of surrounding soil directly affect system performance.
Radon-resistant new construction (RRNC): Building practices incorporated during construction to reduce radon entry, including a gravel sub-slab layer, plastic sheeting vapor barrier, PVC vent pipe, and electrical junction box rough-in for future fan installation. RRNC homes may start with a passive (unpowered) system that can be activated with a fan if radon levels remain elevated.
AARST-NRPP: American Association of Radon Scientists and Technologists – National Radon Proficiency Program. One of two primary national certification bodies for radon mitigation and measurement professionals in the United States.
NEHA-NRPP: National Environmental Health Association – National Radon Proficiency Program. The second major national certification program for radon professionals, recognized by the EPA and most state radon programs.
CO₂ tracer gas diagnostic test: A diagnostic procedure in which a technician introduces carbon dioxide gas near potential radon entry points to verify that the mitigation system’s suction field captures it. Used to confirm adequate sub-slab pressure field extension and to identify gaps in system coverage.